Showing posts with label The Pinterest Report. Show all posts

Saturday, March 30, 2013

The Pinterest Report: Headband Upcycle


Week Sixteen: Headband Upcycle

Apologies, my dear readers, but I can't seem to find the place I first saw this project.  So we'll skip The Pin and The Link and go straight to The Test, because this project is so fun and easy I have to share it anyway!


The Test:

What you'll need: a headband, ribbon, hot glue gun and sticks, decoration (extra ribbon, fake gems, fake flowers, small feathers, etc. - optional)


What to do: Make sure you have enough ribbon for the whole headband before starting this project!  Now, hot glue the end of the ribbon to the underside of one end of the headband.  Squeeze a line of glue along the underside of the headband and carefully wrap the ribbon around and press it into the glue.  Make sure not to overlap the ribbon too much, but don't leave gaps either.  And don't burn yourself!  Take it from me: no fun.


Continue gluing small lines and wrapping until the whole headband is covered, then cut any leftover ribbon and glue the end to the underside of the headband end.  All done!  I didn't do this part, but if you want, you can add feathers, gems, bows, flowers, or whatever tickles your fancy. :)


I love my new-old headband!  The old white headband I used was dingy and yellowed and just bleck.  But now this matches a couple of my favorite shirts and brightens my hair up easily!

The Grade:


Saturday, March 9, 2013

The Pinterest Report: Curling Wand Tutorial


Week Fifteen: Curling Wand Tutorial
{all photos linked to source}

The Pin:


how to use a clipless curling wand


The Link:


The Test:


What you'll need: curling wand, heat glove (optional), heat protection spray (optional)

What to do: This time I'll just let you follow the link.  It's pretty awesome :)

My results:


The Grade:


I love this one! :D Best curls I've ever gotten from any method!


Saturday, March 2, 2013

The Pinterest Report: Hiatus

Sorry, due to a definitely-not-planned stay in a hospital (heart condition but nothing to worry about), this week The Pinterest Report is on hiatus.  Stay tuned for next week's project!

In the meantime, I'm guesting on the OneWord365 blog this week on How to Keep Your Word Alive.  Go check it out! :)

Saturday, February 23, 2013

The Pinterest Report: No-Heat Hair Curling


Week Fourteen: No-Heat Hair Curling
{all photos linked to source}

The Pin:


no-heat wavy hair tutorial
The Link:


The Test:

What you'll need: Wet hair and time.

What to do:  Separate your hair like into pieces, like you would to curl it with an iron.   Then twist each piece completely, like this:


Then let it dry naturally, making sure it stays twisted up.  It should curl beautifully.... according to the original link, anyway.

These are my results:


immediately after taking out the dry twists


a short while later

The Grade:

As you can see above, it did not work.  At.  All.


Saturday, February 16, 2013

The Pinterest Report: Toilet Paper Tube Pillow Boxes


Week Thirteen: Toilet Paper Tube Pillow Boxes
{all photos linked to source}

Note: Thursday's post was probably not worded as well as it could have been.  I intended it to sound like "We should love people all year, not just Valentine's Day."  Instead I feel like it came across more as "I hate Valentine's Day, such a dumb idea!"  Please know this was not what I meant!

The Pin:

do it yourself toilet paper tube pillow boxes

The Link:


The Test:

What you'll need: pretty/scrapbook paper, scissors, tape, ribbon, at least one toilet paper tube, small gifts (I used candy)

What to do: Really, this is one of the easiest Pinterest projects I've done.  Measure and cut a rectangle of scrapbook paper to go around the middle of the TP tube.  Tape it down and cut a piece of ribbon to go around the middle of that.  You can make a ribbon bow with it if you'd like.  Tape it down.

Now pinch and then push in the ends of the tube.  You'll have to go with the photo on this one, since it's hard to explain.  Fill the tube and close the other end the same way.  Tape down the ends if you need to.

Tada!  Finished.  Sorry, but I only have finished-project photos today, since once again I forgot to take pictures while working.


The Grade:

Fun, easy, fast, versatile, only needs a few supplies - I love this one!


Saturday, February 9, 2013

The Pinterest Report: Handmade Photo Key Chains (Part Two)


Week Twelve: Handmade Photo Key Chains, Part Two
{all photos linked to source}
{See part one here.}

This was a particularly long project, which in turn means this is a particularly long post with a lot of photos.  It might slow down your computer or take a while to load.

The Pin:


mod podge photo key chains
The Link:


You'll need: mod podge, paintbrush, decorating stuff (scrapbooking paper, stickers, die cuts, contact-size photos, colored pens, paint, etc.)

What to do: Obviously, this part is way open to your own choices and creativity.  However, I'm sharing how I make my key chains.  Feel free to copy my process!


Step One: Cut a small rectangle of scrapbooking paper, slightly bigger than your key chain base piece.  Mod podge one side of the key chain to the back of the paper.  Trim and let dry.  (I worked on six key chains at a time, so that by the time I'd finished each step with the sixth, the first piece was dry enough for the next step. Also, I forgot to take a photo of this step.  See the third and fourth pieces in the photo above.)

Step Two: Decorate the key chains with... well, whatever you want!  For one I printed off a photo of Adam, a boy I babysit, and added a sticker and some glitter dots I cut off some glitter scrapbooking paper.  Another key chain I made has a photo off the internet of daffodils, with some decorative paper that I wrote "Dream of Daffodils" on.  My third just has a "Dream" 3D scrapbooking sticker.


Step Three: Paint the backs of the key chains and let dry.  This make take several coats, depending on how dark the color is, and if you're perfectionist like me you may want to use a tiny brush to carefully paint the textured white edges of the key chain card.  I like the paint idea, because that way it's clearly the back and it's simple and plain, but it's not the ugly back of a gift card.  You could easily use colored or scrapbooking paper, or even make the key chain double sided.


Step Four: Once the paint is completely dry, mod podge the front of the key chains.  Let dry and repeat on the back.  This prevents the key chains from getting scratched or having add-ons on the front peel off.


Step Five: Put the key chain on something - a key ring, string, ribbon, one of those small ball chains, a pipe cleaner, even a necklace string or chain.  It doesn't have to be a key chain!

 Ta-da!  All done!

The Grade:

I really enjoyed this project, especially the fact that it took more time and allowed for a lot more freedom and creativity than most Pinterest crafts I've tried.  I'll definitely be repeating this one!  It even works for gifts; I gave the key chain with Adam's photo to his mom and she loved it!


Saturday, February 2, 2013

The Pinterest Report: Handmade Photo Key Chains (Part One)


Week Eleven: Handmade Photo Key Chains, Part One
{all photos linked to source}

This was a particularly long project, which in turn means this is a particularly long post with a lot of photos.  It might slow down your computer or take a while to load.

The Pin:


mod podge photo key chains
The Link:


My Crazy Life as a Farmer's Wife: Instructions for my key chains!

The Test:

(As part one, this is technically a test of the pin only.  See, the link uses pre-made key chains purchased online.  However, this was a test on the idea with the pin, which was to make the key chains using old cards.)

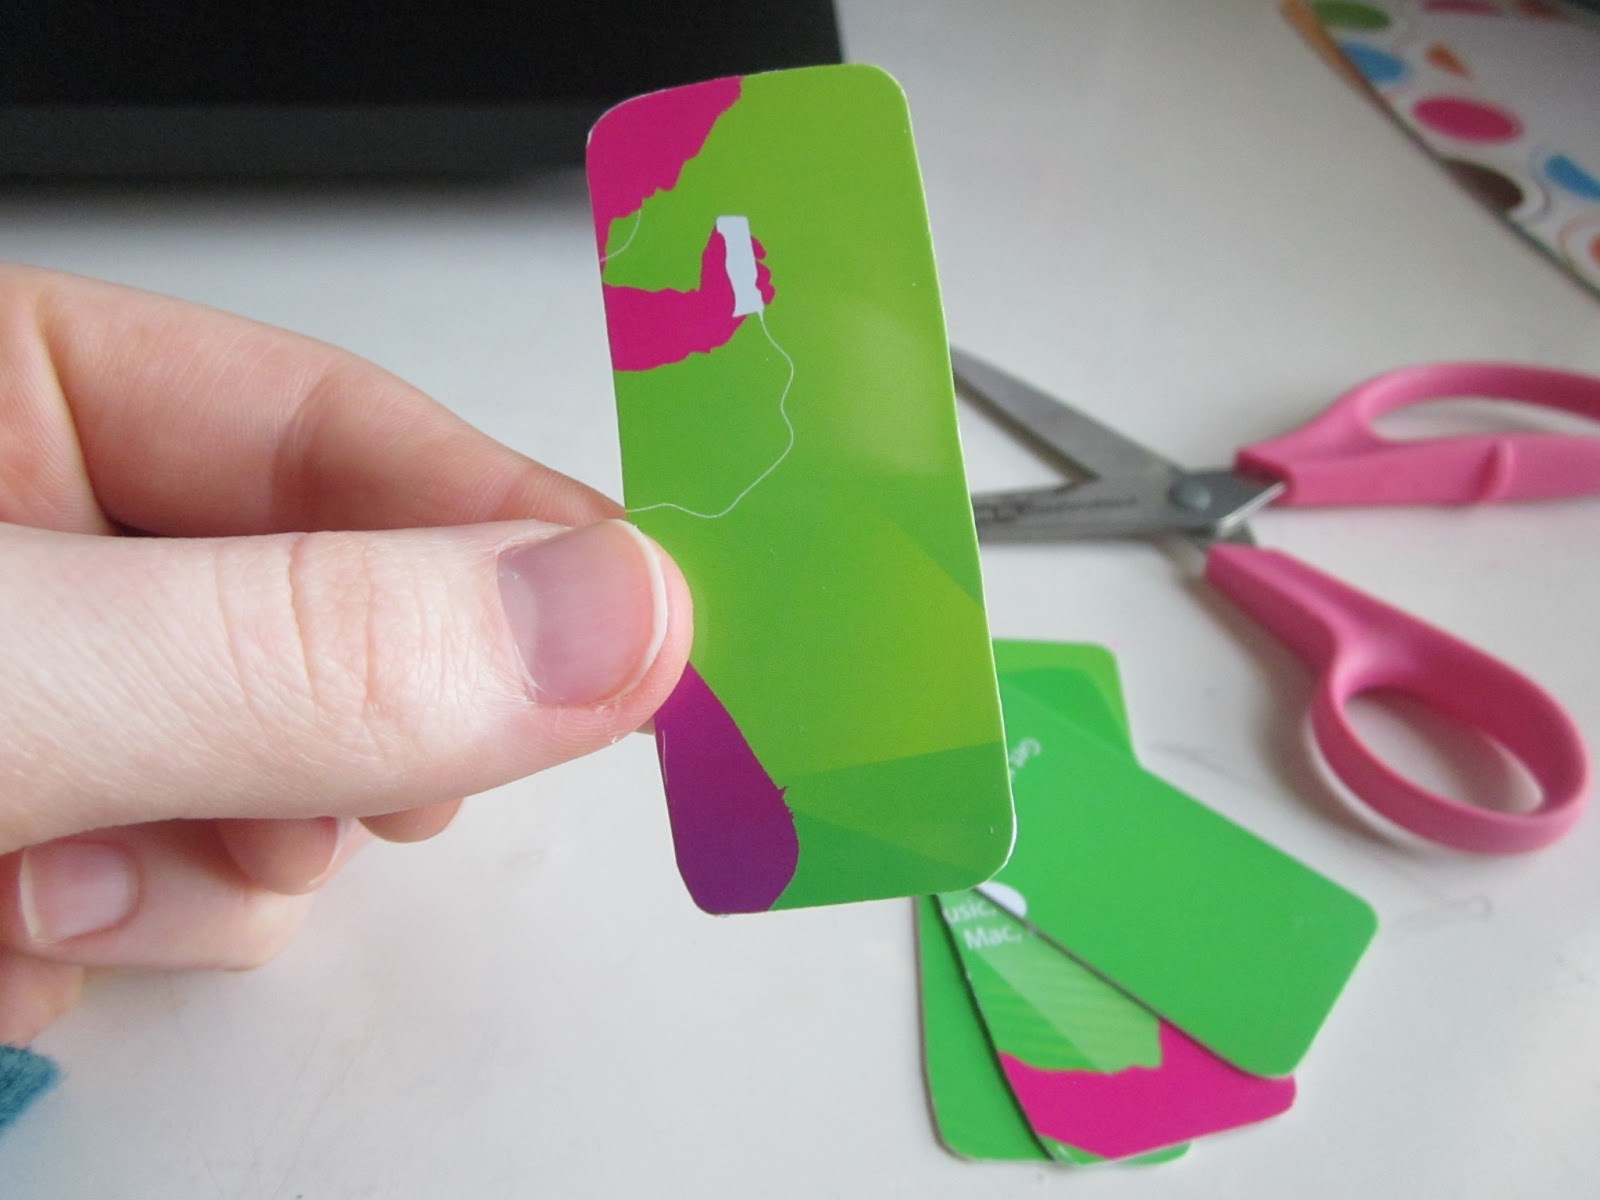
You'll need: At least one old gift/credit/debit card, scissors, ink pen (optional)


What to do: First, cut the gift, credit, and/or debit cards into rectangles about the size of the key chains you'll want.  I really like how they all turn out a little different.  Make sure to round off the sharp corners, too.


Now we need a hole to hang the key chains on.  I learned later on that my holes, which I was afraid I was making too big, were actually too small.  So be sure to make them a little bigger than mine!

This step is optional, but it really helped me: use the ink pen to put a dot where you'll want the hole.


Now line up the tip of your scissors with that dot.


And, a bit unconventionally, (try to be safe!) twist, turn, push and otherwise scrape your way into that little dot.  Make sure not to crack, break, or shatter the gift card.  Also, twisting the key chain between scissors and work space (like I did) may cause damage to the work space.  This step is also time-consuming.  Consider yourselves warned.


Although it feels like you're making absolutely no headway, eventually you'll get a small hole like this.  That's where it gets a bit easier!  Using your fingers to control and back the key chain, carefully and slowly wedge/twist your scissor tip into the hole until you get a visible bump on the back:


Line up your scissors with this, just like you did with the ink dot on the front, and repeat the dance of the scissors!  Once you finally get a hole through, twist and push your scissors in until it's the size you want.  Again, remember that you'll probably need holes bigger than mine.  Learn from my mistake.


Hang with me!  Just one more step to decorating-ready key chains!  You see all that stuff sticking out around the edges of the hole?  That'll be poking out on both sides.  We have to get rid of that.  Over a trash can preferably, line up the edge of your scissors against that poky gunk and scrape it off.  It'll seem a bit like you're playing with a saw.


Do that on both sides, and voila!  You're done and ready to decorate!


The Grade:

Stay tuned for decorating ideas and the grade in part two next Saturday!

Saturday, January 26, 2013

The Pinterest Report: Homemade Pumpkin FroYo


Week Ten: Homemade Pumpkin FroYo
{all photos linked to source}

The Pin:


four ingredient pumpkin fro-yo


The Link:


Skinny Halloween Treat: 4-Ingredient Homemade Pumpkin Frozen Yogurt

The Test:

You'll Need: one cup nonfat vanilla yogurt, one cup pumpkin puree, one tablespoon sugar, one teaspoon pumpkin pie spice, large mixing bowl, freezer and timer or ice cream maker


What to do: Mix the ingredients.  Pretty simple.


Now, either give it a few minutes in the ice cream maker, or stick it in the freezer.  I went for the freezer option since my family doesn't own an ice cream maker.  If you choose to put it in the freezer, be sure to set a timer for thirty minutes and stir every half an hour until the yogurt is frozen enough for your tastes.


Now eat!

Personally, I didn't care for the texture, but it was the best that could be expected without a proper ice cream machine.  As for taste, this was definitely a flop in my family.  I love pumpkin stuff if it's not pie, but I didn't like this.  Out of the four kids, only one likes pumpkin pie, and after a few bites he decided he didn't like the froyo either.

The Grade:

Cool idea, but would probably be better if we had an ice cream maker and/or really liked pumpkin pie.