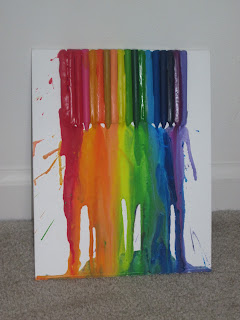
Week Five: DIY Melted Crayon Art
{all photos linked to source}
The Pin:
Naptime = Craft Time! Melty Crayon Art
The Link:
The Test:
You'll need: Hot glue gun and glue sticks, canvas, regular wax crayons (number of crayons depends on size of canvas and whether you prefer horizontal or vertical), blog dryer, newspaper or other drop-cloth/protect-your-work-surface item
What to do: Line up your crayons on the side or top of the canvas. I forgot to take photos until after I finished, so you'll have to follow the link to see the original photos. The lady from the link left her wrappers on, but I used a generic non-Crayola brand I found for 10 cents a box (score!), so I peeled the wrappers off mine.
Once your crayons are lined up how you want them, hot glue them to the canvas. Then lay out your newspaper (I used wax paper because I was a total idiot and forgot how much scrap newspaper we have). You'll have to do some figuring to get the canvas propped up - you want it slightly slanted, but mostly standing up. Be warned that this project can get messy.
Now use your blow dryer on high to get the crayons melting. Switch between settings and move back and forth as necessary. Different colored crayons have different dyes, and some are melt-happy while others and virtually melt-resistant.
Once you've gotten a look you like, turn off the blow dryer and let the canvas sit and dry for a minute.
Once I got the hang of it and figured out which crayons were melting better and how different blow dryer positions affected the dripping, this was a lot of fun. I still have a couple of canvases left and I intend to try this again, using a different method from a separate pin. I'm also thinking about printing off some black silhouettes and doing color themes, like a Katniss or Mockingjay silhouette with all orange, red, and yellow crayons. The possibilities are endless!
The Grade:


No comments:
Post a Comment